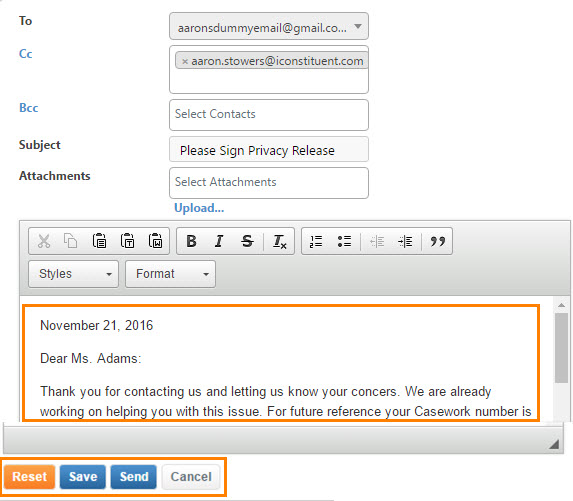
In Services, you are able to write letters to any contacts associated with that case.
- Click Services.
- Select the Case ID of the case you would like to write a letter, Case Details opens.

To compose a letter to send by Email:
- Click the Email tab.
- From To, select a contact email address.
- If you wish to CC and/or BCC a contact, select a contact email address.
- Enter email Subject.
- To upload and attach one or more files, click Upload link.
- The Choose File to Upload dialog opens, select file you wish to attach and click Open button. Repeat to attach additional files. Files upload progress will display in an Upload Queue dialog in the lower right corner of your screen, ignore the dialog or click the orange down pointing arrow to minimize.
- Search Letters to select a letter template (Form letter) to use as base or leave Letters blank to compose letter from scratch (Quick letter).
- Click Settings link to display additional fields.
- Verify the correct Primary and Related contact's information is displaying. This information may automatically merge into your email.
- To send email out using your own Footer (not Member's), select Footer. Please note that your personalized footer must be setup in advance by our support team. To send email out using the default Member's Footer, skip this step.
- Click the Compose button to begin editing and/or drafting email message.

12. The HTML Editor opens, enter and/or edit email text. Note the HTML-Header (date, salutation, etc) and the HTML-SIGBLOCK (signature footer) automatically displays. Place cursor in the body (below the header but above the footer) and enter new text. If copying or pasting from another application such as Microsoft Word, ensure proper formatting by using the Paste As Plain Text or Paste From Word toolbar buttons in the editor.

13. Click Save.
14. Click Print.
15. Click Cancel to exit without saving.
16. Click Reset to place text back to the original state.
Editing unsent Emails:
1. From Case Details, select the email thread you wish to edit.
2. Email Details displays in the right panel.
3. Click the Edit link. Note that once an email has been sent it can no longer be edited.
4. Make edits.
5. Click Save.
6. Click Send.

Comments
0 comments
Please sign in to leave a comment.