NOTE: If you are a U.S. House of Representatives client, bulk CRM data must be imported by vendors after the data has undergone a cleaning process by the House.
Import Contacts allows users to import large amounts of data to create or update contact records and to create correspondence activities
Formatting Your Data
Before uploading your list, it's very important to format your data correctly.
- The two types of files that can be imported are CSV (comma separated values) and TXT (text) files. We recommend using an Excel document saved as a CSV file.
- To format a CSV properly, it is important to avoid the following "forbidden characters": !#$%^&*()_+=?/.,";:[]{}.
- Each column should be labeled. (You only need constituent contact information. Personal codes and activity information can be applied during the import process. All imported contacts will be assigned the same interest codes, personal codes, etc. If you have contacts that need to be assigned different codes, upload the lists separately.)

For additional instructions on formatting, see our article How should I format a list of contacts for import into Signal?
Importing Your Data
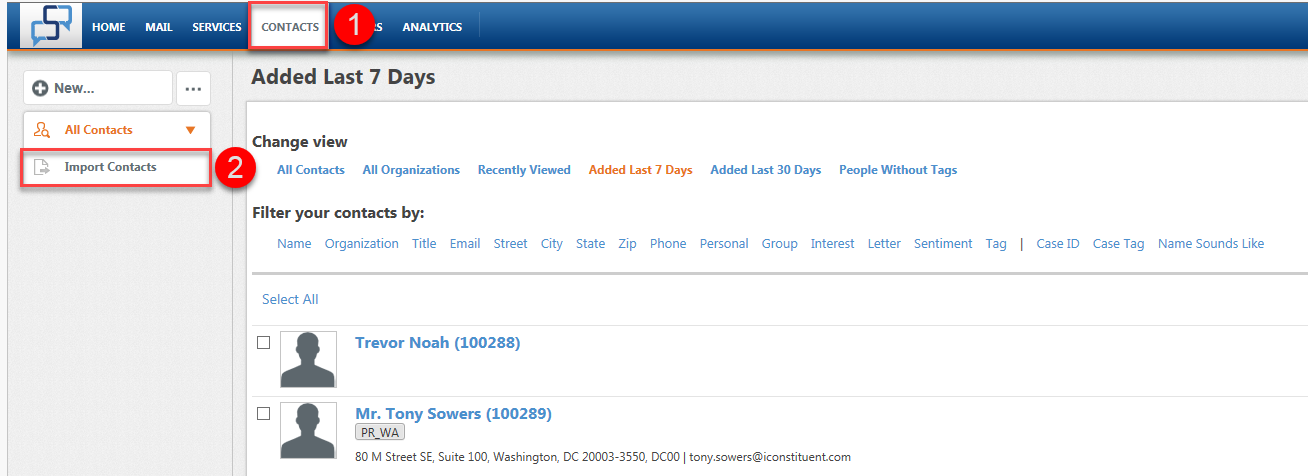
- Start by selecting Contacts from the top navigation menu, then select Import Contacts from the left navigation panel.
- Click Import Contacts.
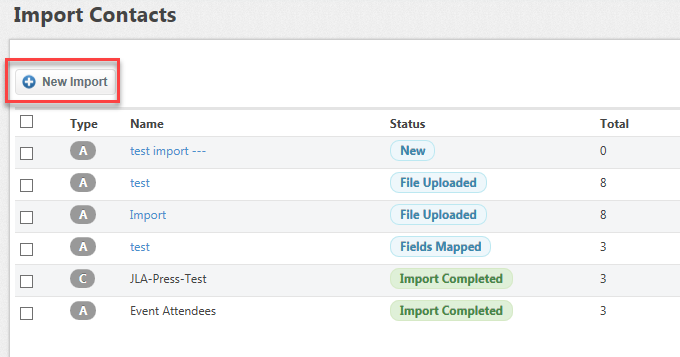
- The Import Contacts window opens, click the New Import button.
- The List Upload dialog opens, click in the Name field and enter "list name".
- Select either Contact Only (contact information name, address, etc) or Contact with Correspondence (contact information and mail activity) as the "Import Type."
- In the "Duplicate Match" field, specify how you want the import process to match contacts to existing contact records in the database. You can choose to match by Name and physical address, Name and email address, Email address, or Name address and email address
- From the Default Contact Information section, click in the Personal Code field and enter "personal code" to assign to all contact records being imported (optional). Use the Search icon to search list of personal codes or create a new one. (Repeat this process to add more than one code.)
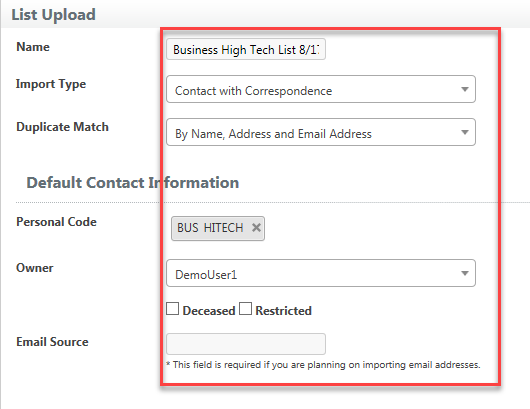
- The Owner field should default to your "staff ID", if not, select from the drop-down menu.
- If the contacts need to be flagged as Restricted or Deceased, check the appropriate box.
- Enter Email Source if you are importing email addresses (required).
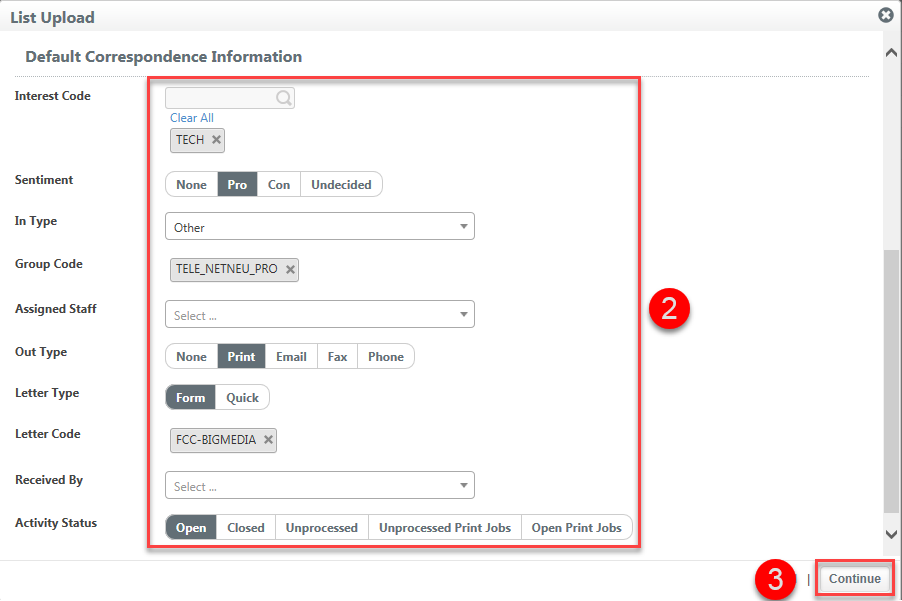
- If you selected Contact with Correspondence as the import type, then you will see additional fields in the Default Correspondence Information section. In this section you will for you to apply default correspondence activity information. Fill out the information as completely as you can, making sure to assign at least an interest code, assigned staff member, and activity status.
- Click the Continue button.
Uploading Your List
- After clicking the Continue button in the previous section, the List Upload dialog opens.
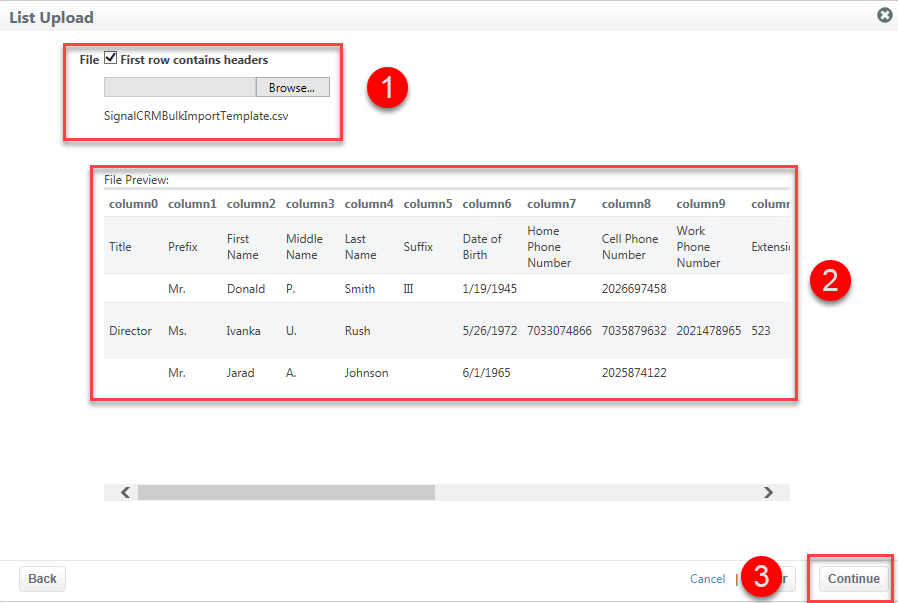
- Click the Browse button to find the file to be imported. See How should I format a list of contacts for import.
- Select the file and click Open.
- Contents will display in the File Preview section of the List Upload dialog.
- If the file contains a header it will display on the top line of the preview (title, prefix, first name), place a check in the First row contains headers checkbox.
- If everything looks as it should, click the Continue button. If not, then click Clear and revisit your CSV file to make any necessary edits
 .
.
Mapping Your Data
To ensure that your data is entered correctly, you will have the opportunity to map your import data. Basically, you will take your columns and match them to the correct field names in the program.
For instance, one of my original columns is labeled "companyname," but there is no company name field in the program. I need to match it to the appropriate field name so that the system will recognize this information and know where to insert it in the constituent's record. The best match is "Organization Name."
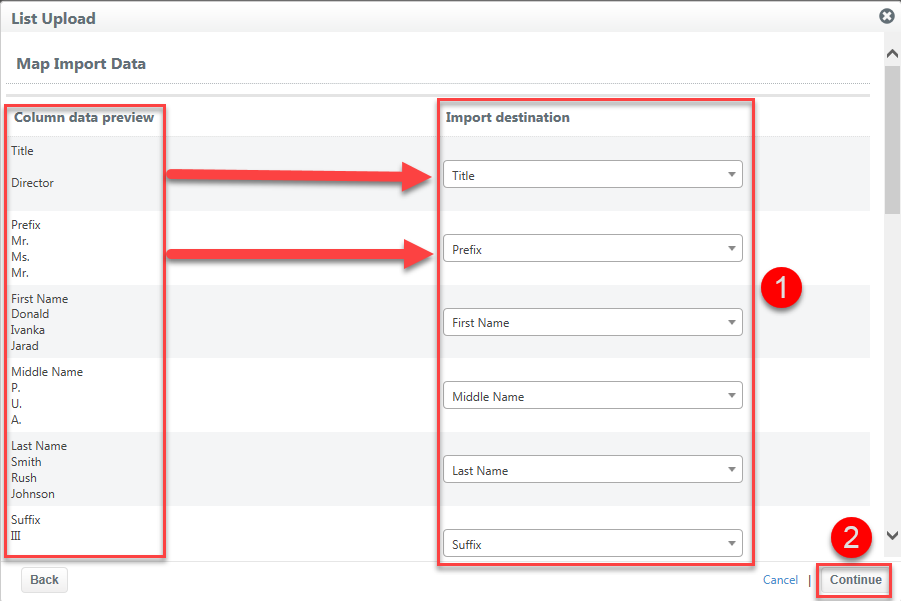
You will see a summary of each column with a dropdown menu on the right. Select the correct field label from the dropdown menu for each one. Then click Continue.
You'll have an opportunity to preview how the file will be mapped. If you need to change anything, click the Back button on the bottom left corner. Otherwise, click Import.
Your file is now ready for import. You will be returned to the Import Contacts screen and can monitor the status of the import from there.
Comments
0 comments
Please sign in to leave a comment.