While email and scanned hard copy mail will create correspondence activities automatically as they are imported, there are number of instances where you will need to manually create activities. Some examples include tracking constituent sentiment, logging phone messages, and writing congratulatory letters.
Search for Contact
The first step to creating an activity is finding a contact.
1. From the top navigation menu, select Contacts.
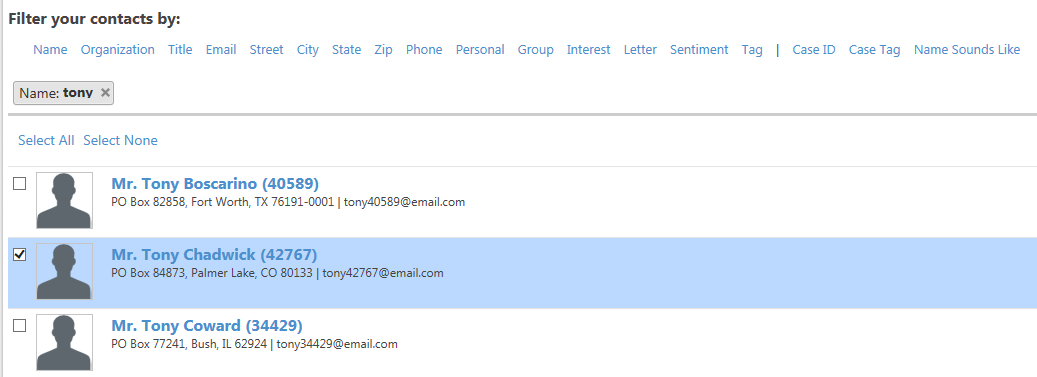
2. To filter contacts use Filter your contact by: links, select the appropriate link. For instance, to find a contact by name, select Name, and type in the contact’s name. If you have additional information to narrow down your results, select the correct filter, and type in the keyword or number.
NOTE: Selecting the same type of filter will create an “Or” search. For instance, selecting Name once and typing in “Joe Wallace,” and then selecting Name again and typing in “Joseph Wallace” will yield both the Joes and the Josephs.

3. Your search results will display below. Check the box in front of the constituent’s name, and select the Create Activity button on the right. (To select more than one contact, check each contact’s name or click Select All above the list of contacts.)

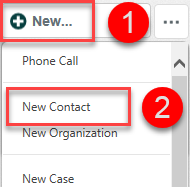
4. If the contact is not in the database, you can create a new contact record by clicking the New button on the upper left, and selecting New Contact from the drop-down list.

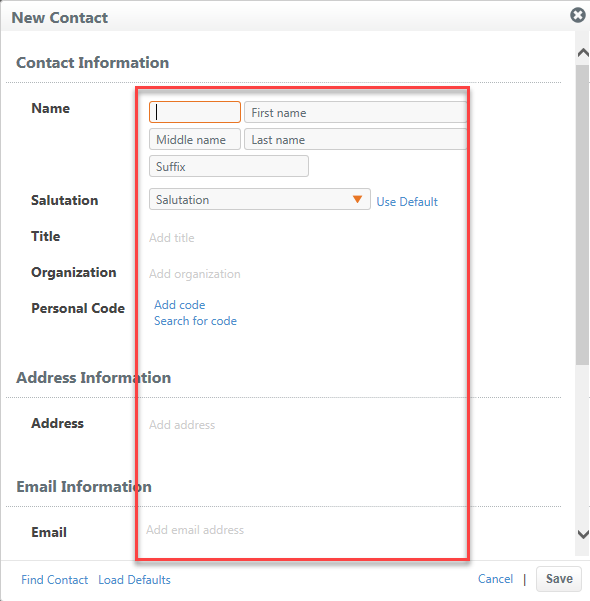
5. The New Contact entry form opens, complete the contact information.

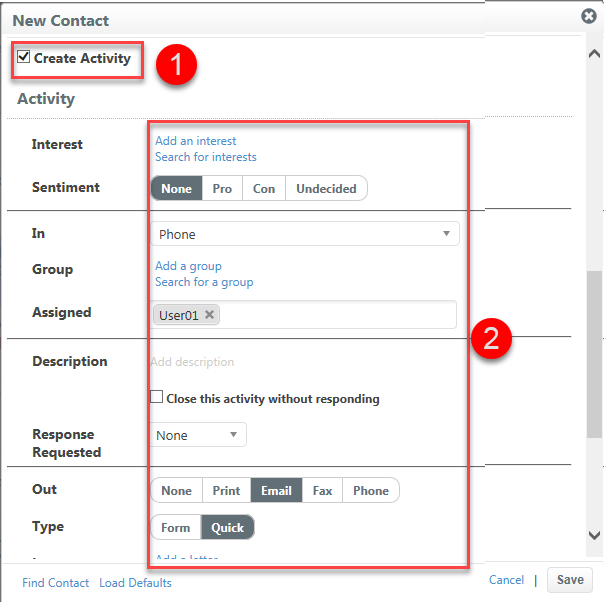
6. Click the Create Activity checkbox at the bottom of the form to create a new communication activity.

7. When the Create Activity form appears, fill out the relevant fields:
- Interest: Interest code indicates which legislative issue(s) the correspondence pertains to (IMM, ENV, ANML, BUD, TAX, etc.) Click Add an interest to type in an interest code if you already know the one you need to use. (Repeat the process if more than one interest code applies.) Click Search for interests to search for interest code(s) or to create a new one.
- Sentiment: Sentiment is the constituent’s opinion about the issue. Select the sentiment or leave it set to None. (Previously tracking sentiment was only available through the Polling module. Individual Polling has been phased out, and sentiment can be tracked for any type of activity. Anonymous Polling is still an option under the New button above the left navigation panel.)
- In: This is how you received the activity (Mail, Email, Phone, Visit, etc.) Select the correct in type from the dropdown menu.
- Group: The group code is typically used to group similar correspondence activities together that will eventually receive the same form letter from your office. Click Add a group to type in a group code if you already know the one you need to use. Click Search for a group to search for a group code or to create a new one.
- Assigned: This is the staff member who will be responsible for responding to or following up with the correspondence activity. Select the correct staff member from the dropdown menu.
- Description: Description is a free-type field for adding notes about the incoming message. If you’re creating an activity for a phone call, for example, this is where you would type the phone message. Click Add description. (If you do not need to respond to the activity, then check the “Close this activity without responding checkbox.”)
- Out: This is how your response will go out. Select the correct option. (Select None if you are closing the activity without responding.)
- Type: Type designates the type of letter you will be sending. A form letter is a letter that will be sent out to multiple contacts. A quick letter is a letter that you will be editing for an individual constituent. Select the correct type.
- Letter: Select the letter you plan to send to the contact. Click Add a letter to type in a letter code if you already know the one you need to use. Click Search for a letter to search for a letter code.
- Attachment: If you need to attach the incoming correspondence to the activity, click Upload. Click the paper icon to browse out for a file. Select the file and click Open. Then click Upload.
- Additional: Clicking Show Additional at the bottom of the form will allow you to change several fields that do not typically need changing. These include owner, due date, received date, and received by.
Save Defaults (optional)
If you often create the same type of activity such as logging phone messages, or if you have a large number of duplicate activities to create such as a petition signed by a number of constituents, you are able to save the desired fields so the next time you create an activity, your fields will automatically be completed.
1. Fill out the form with the desired activity fields, click Save Defaults link on the bottom of the Create Activity entry form.
2. Click the Save button.

3. From the Contact search results click the Create Activity button.

4. If a response was requested, the new activity or activities will now be listed in the My Mail folder of the staff member to whom the activity is assigned.
Comments
0 comments
Please sign in to leave a comment.