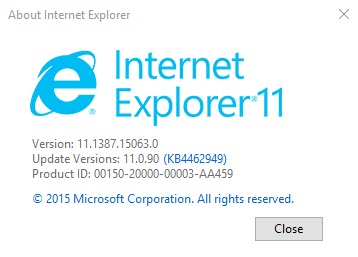
If you are using CRM 1.4 for the first time or have a new PC, you will need to adjust your Internet Explorer 11.0 settings.
.
NOTE: If you write or edit letters in the CRM you must use Internet Explorer. If you solely work in Services, you may now use Google Chrome for your browser.
Users using Microsoft Word 2013 or higher you will also need to adjust your Reading Mode. See our article I'm using Microsoft Word 2013 or 2016.
1 - Access Internet Explorer Tools
- Close all other open Internet Explorer sessions and then open the CRM.
- Click the Tools (Gear) icon.
- From the Tools drop-down menu, click Internet options.

2 - Set your Temporary Internet Files and Browser History Settings
- Go back to the toolbar, and select Tools.
- Select Internet Options.
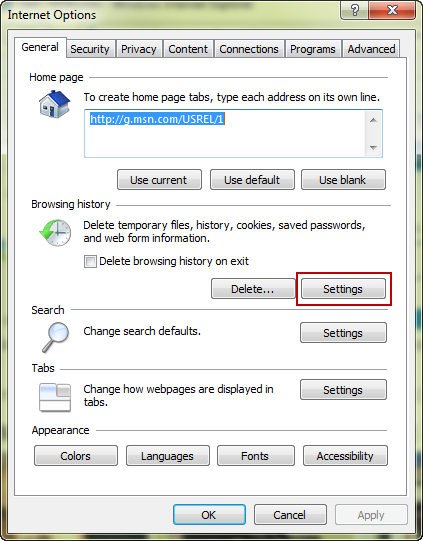
- Under the General tab, select Settings below the Browsing History section.
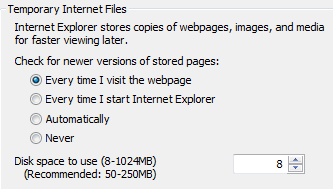
- Make sure "Every time I visit the webpage" is selected.
- Change the "Disk space to use" to 8. Then click OK to save changes.
3 - Set your Security settings
The "Internet Options" window should still be opened. Select the Security tab.
For U.S. Senate users only.
- From Security tab, select Local intranet and then click the Sites button.
- Select the Automatically detect intranet network checkbox and click the OK button.
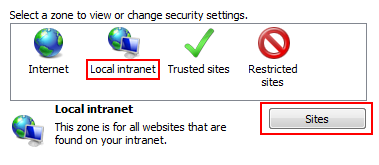
- The Local Intranet dialog opens, click the Advanced button.
- Another Local Intranet dialog opens, enter the CRM url (for example, https://gateway-ia.senate.ussenate.us/) in the Add this website to the zone field and then click the Add button.
- Site will list in the Websites field, click the Close button.
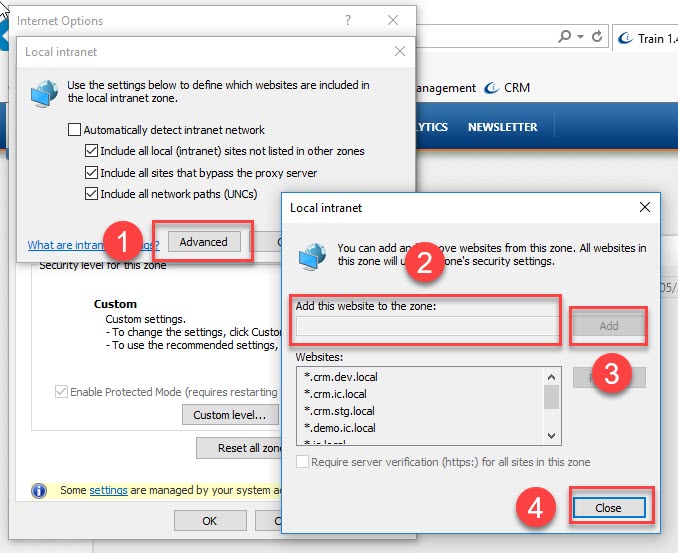
- Click the Close button again.
- Click the Apply button to save changes.
- Skip to section 4 - Set Custom Level Security below.
For Non U.S. Senate Clients Only
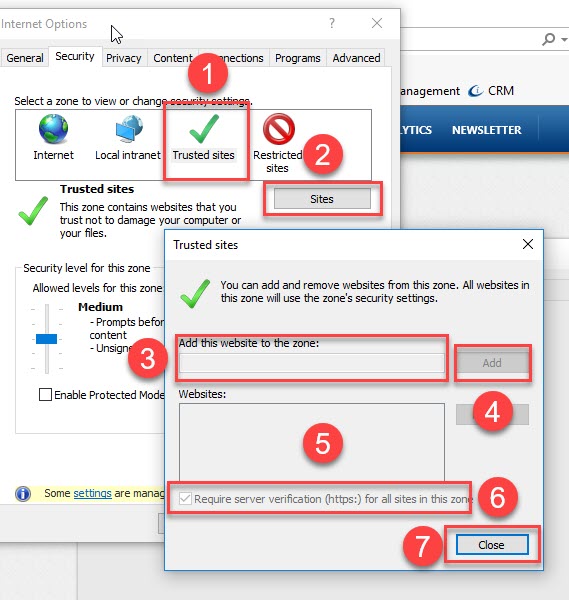
- From the Security tab, select Trusted sites and then click the Sites button.
- The CRM url is not already added to the Trusted sites list, click Add.
- Make sure Required server verification (https:) for all sites in this zone is not checked.
- Click Close and then click Apply.
4 - Set your Custom Level Security
- Still within the "Security" tab, click the Custom level button.
- Set the Reset To: drop-down to Low and then click the Reset button.
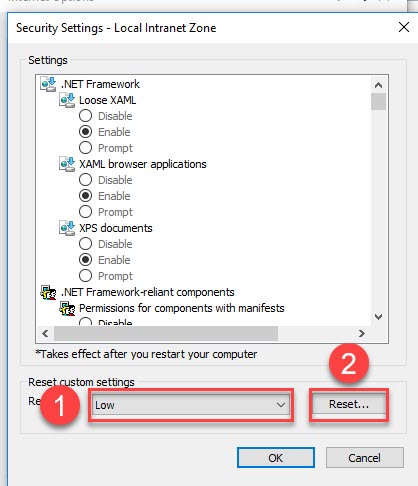
- **THIS STEP IS EXTREMELY IMPORTANT** Now you will need to make sure that ALL settings are all ENABLED except those in the next step. To enable simply click the Enable radio button next to the setting.
- **THIS STEP IS EXTREMELY IMPORTANT** The following settings should be DISABLED - 1) Allow Active X Filtering, 2) Use Pop-up Blocker, 3) Use Smart Screen Filter or Windows Defender SmartScreen, and 4) Enable XSS Filter. To disable, simply click the Disable radio button next to the setting.
- **THIS STEP IS EXTREMELY IMPORTANT** Set User Authentication (last in the list) to Automatic logon with current user name and password.
- Click the OK button.
- Still from the Security tab, make sure that the Enable Protected Mode is not checked.
- Click the Apply button.
5 - Set your Advanced Tab settings
- Still within Internet Options, click the Advanced tab.
- Find the setting Use software rendering instead of GPU rendering, click the Enable checkbox.
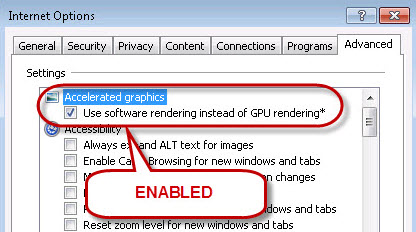
- Scroll down the list of settings until you see "Enable automatic crash recovery" and disable the setting by unchecking the checkbox.
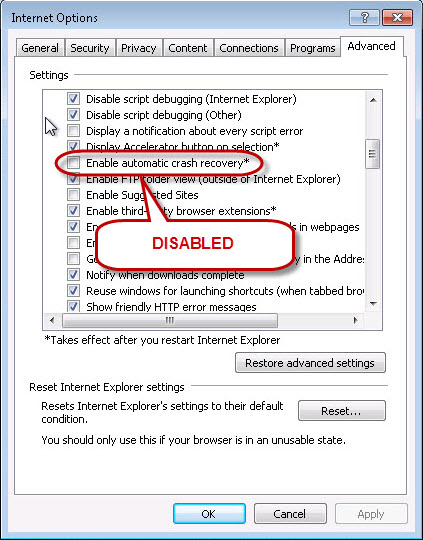
- Click Apply.
6 - Enable your browser's Spell Checker settings
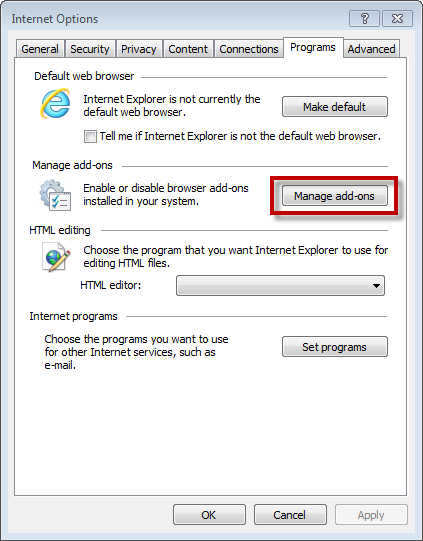
- Still within Internet Options, select the Programs tab.
- Click the Manage add-ons button.
- Select Spelling Correction from the list of Add-on Types.
- Check the checkbox on the bottom left to "Enable spelling correction."
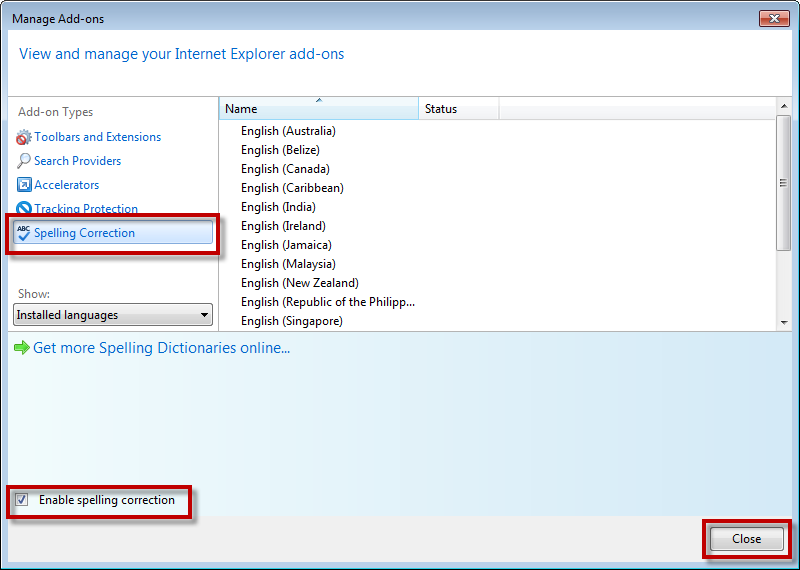
- Click Close.
- Click OK to close "Internet Options" and refresh your browser to see the changes take effect.
Comments
0 comments
Please sign in to leave a comment.