To add or edit a user account, click on the Wrench icon in the upper right corner and select User Management.
Creating a New User Account
Typically when adding a new user, there is already a existing user account that is similar. It is much easier to copy an existing user and mirror their settings rather than creating a new user because the roles, privileges, and preferences will already be set.
- Search for the correct user using the filters listed across the top or clicking on the staff role.
- Select the existing user account you wish to copy by checking the checkbox.
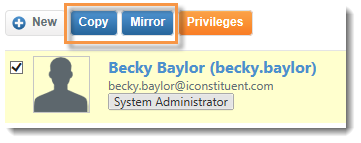
- Several buttons will appear across the top.

- Click Copy.
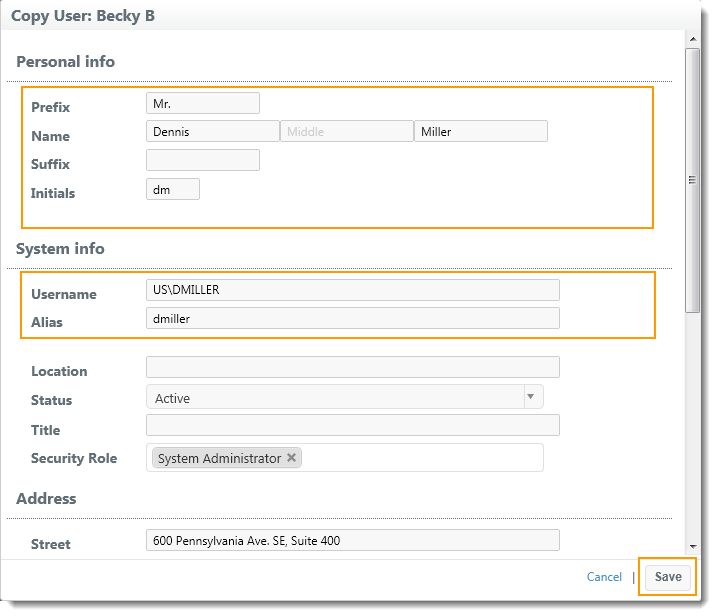
- Type the name of the new user.
- Type the initials in lowercase.
- In the "Username" field, type in the user's complete username, including domain.
NOTE: The username must be full qualified with the domain. House clients should have US\john.smith where US is the domain, and john.smith is the user's Windows log in ID. State and Local government clients should have IC\john.smith where IC is the domain, and john.smith is the user's Windows log in ID for the RDP. - Type in the user's alias as you want it to appear throughout the program.
- Complete the desired address and contact info. Be sure to add an email address for the user if your office has any email notifications enabled.

- Click Save to add the user to the system.
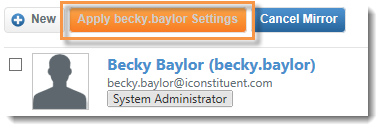
- If you wish to mirror another staff member's user preferences, then select that staff member, click Mirror.
- Select the newly created user account, and click the orange Apply [Alias] Settings.

An important note about roles and privileges:
While you do have the option to edit an individual user's privileges, we highly recommend that you create office roles instead and then apply multiple roles to any users who need additional rights. Unlike a specific user's privileges, roles are easy to identify and can be applied to multiple users.
- To assign an additional role to a user, click on the user's name and type in the desired role in the "Security Role" field.
- You can apply more than one role. The granted privileges will take precedence over the denied privileges.
Editing or Inactivating a User Account
To edit a user account, find the desired user, and click on the user's name. This will allow you to edit name and address information, alias, status, and security roles. After you've made the desired changes, click Save.
NOTE: If you need to inactivate a user account, be sure to read How do I prepare for a departing staff member? first. All records assigned to the staff member should be assigned to someone else, automatic assigning of interest codes or workflows should be updated, and any open print jobs created by the staff member should be closed prior to inactivating the user account. After preparation is complete, change the status of the user account from Active to Inactive.

Comments
0 comments
Please sign in to leave a comment.