Print or email jobs are typically used for transmitting a large amount of responses. You have the option of creating a print or email job every time you are ready to send a response, or you may choose to create daily or even weekly jobs to which you add activities until you are ready to transmit them at a time of your choosing. When you create jobs for printing and emailing, the letters are merged on the server, which means that you won’t actually see it happen. Everything takes place “behind the scenes” so that (a) it’s faster, and (b) you are free to continue working.
NOTE: If you are printing or emailing a small number or responses (i.e., 1-5), it may be easier for you to use the Send button instead of creating a job.
Create a New Job | Send Activities to Job | Merge | Review | Print or Email
You can create a job before working with activities, or you can create a job when you have activities ready to go out. To create the job before sending activities to it, click the ... button, and select Jobs.
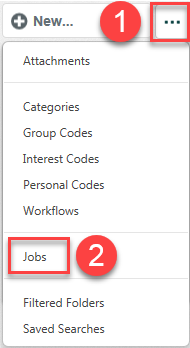
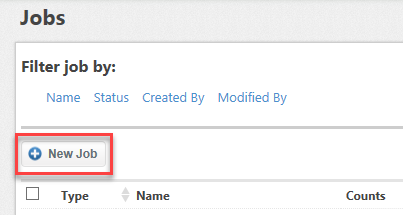
- The Jobs window opens, click the New Job button.
- From the New Job dialog, select the type of job—print, email, or transmit. (A transmit job will print and email, depending upon each activity’s out type.)
- Give the job a name. If you don’t want to give each job a unique name, you can set a default name in User Preferences (user name - date and time).
- If you want an attachment to go out with every item you include in the email or transmit job, click Add Attachment to select a previously uploaded file.
NOTE: If you need to upload a new attachment, select the … icon above the left navigation panel, and select Attachments. Click Upload to upload the file.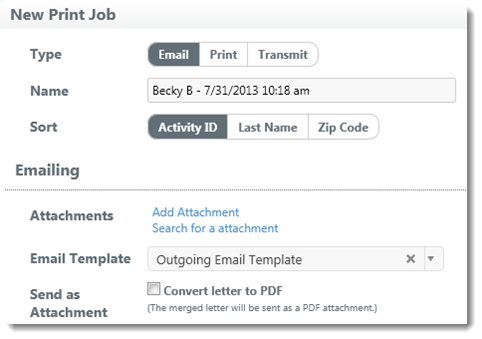
- Make sure you have an email template and/or printer selected. (Typically, these will default with the correct information. These defaults can also be set in User Preferences.)
- Once you have finished setting up your job, click Save.
- The new job will display.

Sending Activities to a Job
When you’re ready to send a group of activities to a job, ensure that a letter is assigned to each, and that the correct out type is set (either print or email).
NOTE: In order to send a response, both quick and form letters must be checked in and published, and form letters must be final drafts. Quick letters are managed on the activity, and form letters are managed in the Letters module.
- If you need to assign a letter or other values to the activities before sending responses, assign the necessary information in the Assign panel, and then click the Assign drop-down and select Assign and Send to Job.)
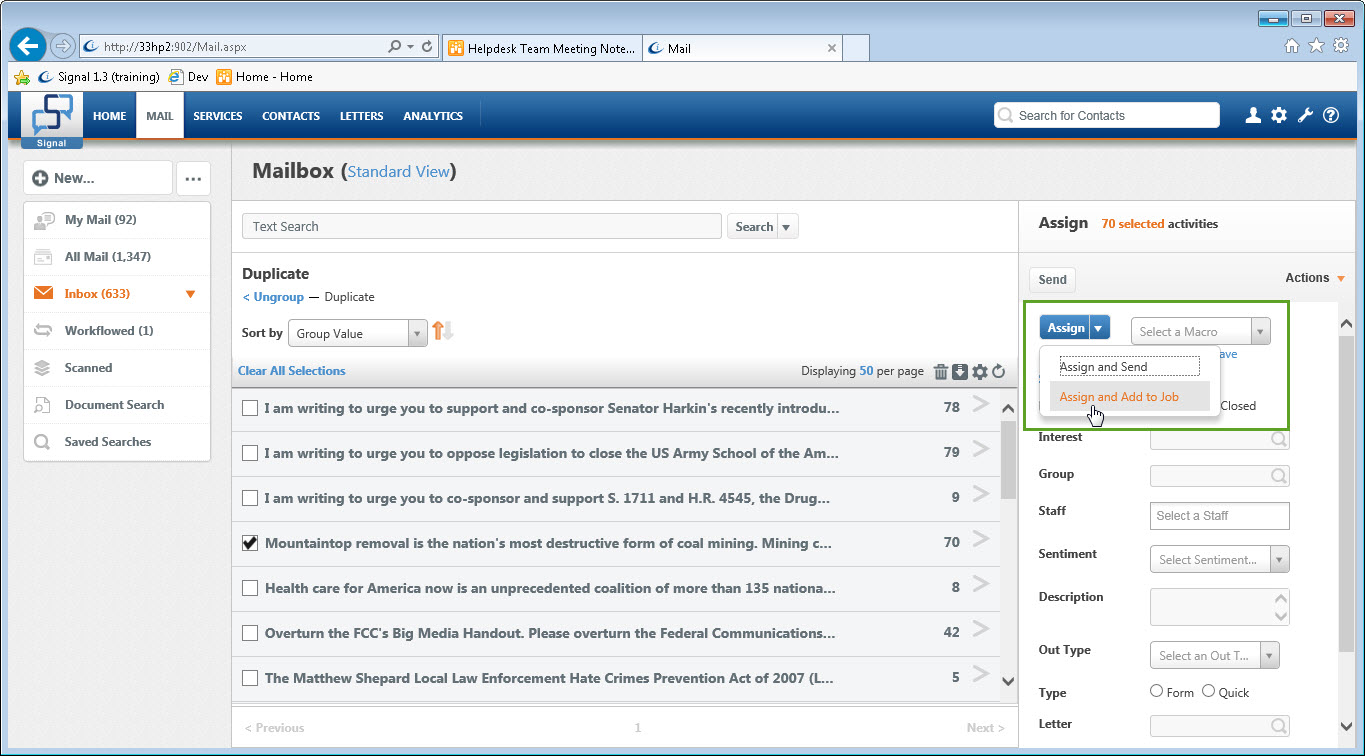
- Or if you have already assigned a form letter and just need to send your responses out, click the drop-down arrow next to Send, and select Add to Job.
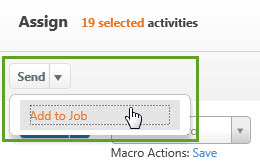
- You will see a list of open jobs appear. If you haven’t yet created a job, click the New link on the bottom right, and follow steps 1-5 outlined earlier for “Creating a New Job.” If the job has been created, select the job, and then click the Add to Job button.

- You can continue to send activities to the job by repeating these steps with additional activities until you are ready to print or email out.
- If you receive issues or warnings when sending to a print or email job, follow the system’s prompts.
Merging the Job
Every job will need to be merged and then transmitted. Merging will take the activities that were sent to the job and merge the constituent information with the form letters to create individual documents. You can then preview the documents before actually sending out. When you’re ready to kick off your job, you can merge it when you send your last group of activities to it.
- Select the last group of activities to go out, and click the same Send to Job icon.
- Select the correct job, and instead of clicking the Add to Job button, click Merge.
(If you are in the Senate, clicking Transmit will merge and then send/print, skipping the preview step. If you are NOT in the Senate, be sure to click Merge if you are printing letters. If you are emailing only, you can click Transmit to merge and send the emails.) - The activity information and the assigned letters will merge and create individual Word documents and/or emails for you to preview, and the status of the job will change from Open to Merge Completed.
Reviewing the Job before Printing or Emailing
After you have merged the job, you can preview the documents within it.
- Start by clicking the […] icon above the left navigation panel to show all folders, and select Jobs.

- If you created a transmit job you will see that during the merging process, the job has now been split into two: one for print and one for email. Click on the job name to open a Print Job’s details.
- The Print Job details will display all of the individual activities. Hover over any one of the activities to see a View Letter and/or a View Email icon. Click the icon to preview.
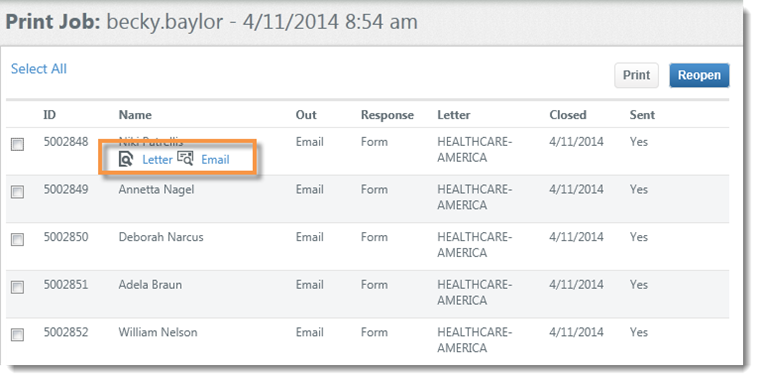
- If you need to reopen any activities to make corrections, select the row(s) and click Reopen.
Printing or Emailing
After reviewing your merged documents, you are ready to print or email.
- If this is a print job and you are not in the Senate, you will need to be in the Print Job Details. Select the job name to open the details. Click Select All and click the blue Print button. Then click the X in the upper right corner to close the Print Job details and return to your list of jobs.
- If this is an email job, or if you are in the Senate, then you do not need to click Select All and Print within the Print Job Details. (If you are currently in the Print Job Details window, click the X in the upper right corner to close the Print Job details and return to your list of jobs.) Check the box in front of the correct job. Buttons will appear at the top of the screen. Select Start Job. Your items will begin transmitting.
If you have not yet merged the job and the status is Open, you will need to click Start Job twice—once to merge and once to email.
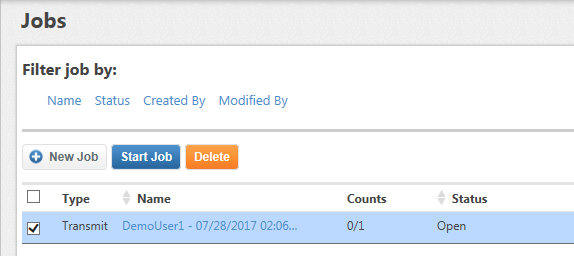
(If you have merged a job and need to reopen it, click Reset Job, which will return the status of a job from Merge Completed back to Open.)
Comments
0 comments
Please sign in to leave a comment.