1. Select Services from the top navigation menu, and then select Flags or Tours from the left navigation panel.
2. Click the request's ID number to open up the details of the request.

3. Or you can also access the request from within the contact's record. Click on the contact's name to open the record. You will see an overview of all the contact's interactions with your office, including any flags or tours. You can click on the ID number to open the request's details, or you can click on one of the options listed below the description to make quick updates.
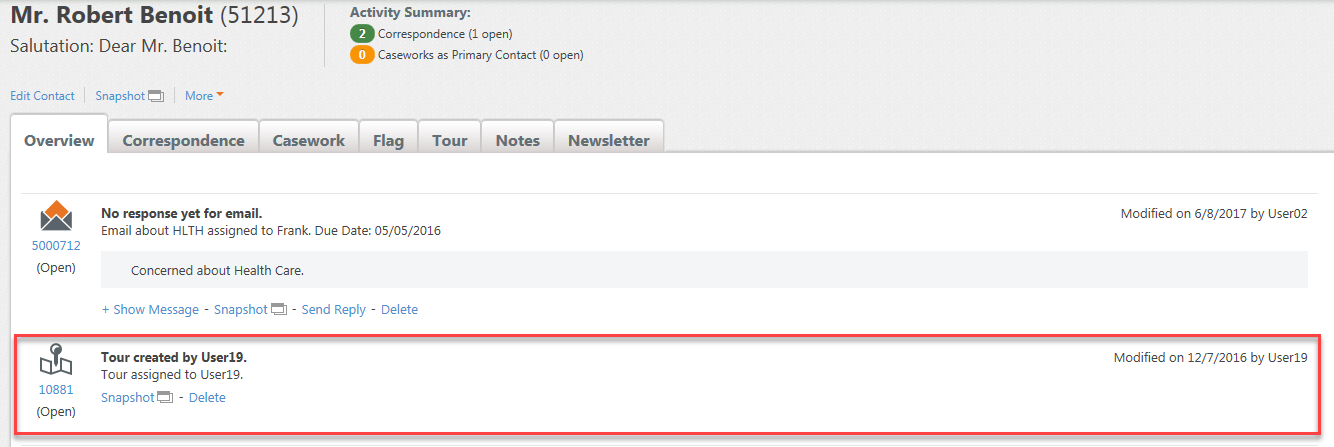
4. Click on the ID number, the Tour Detail window opens.
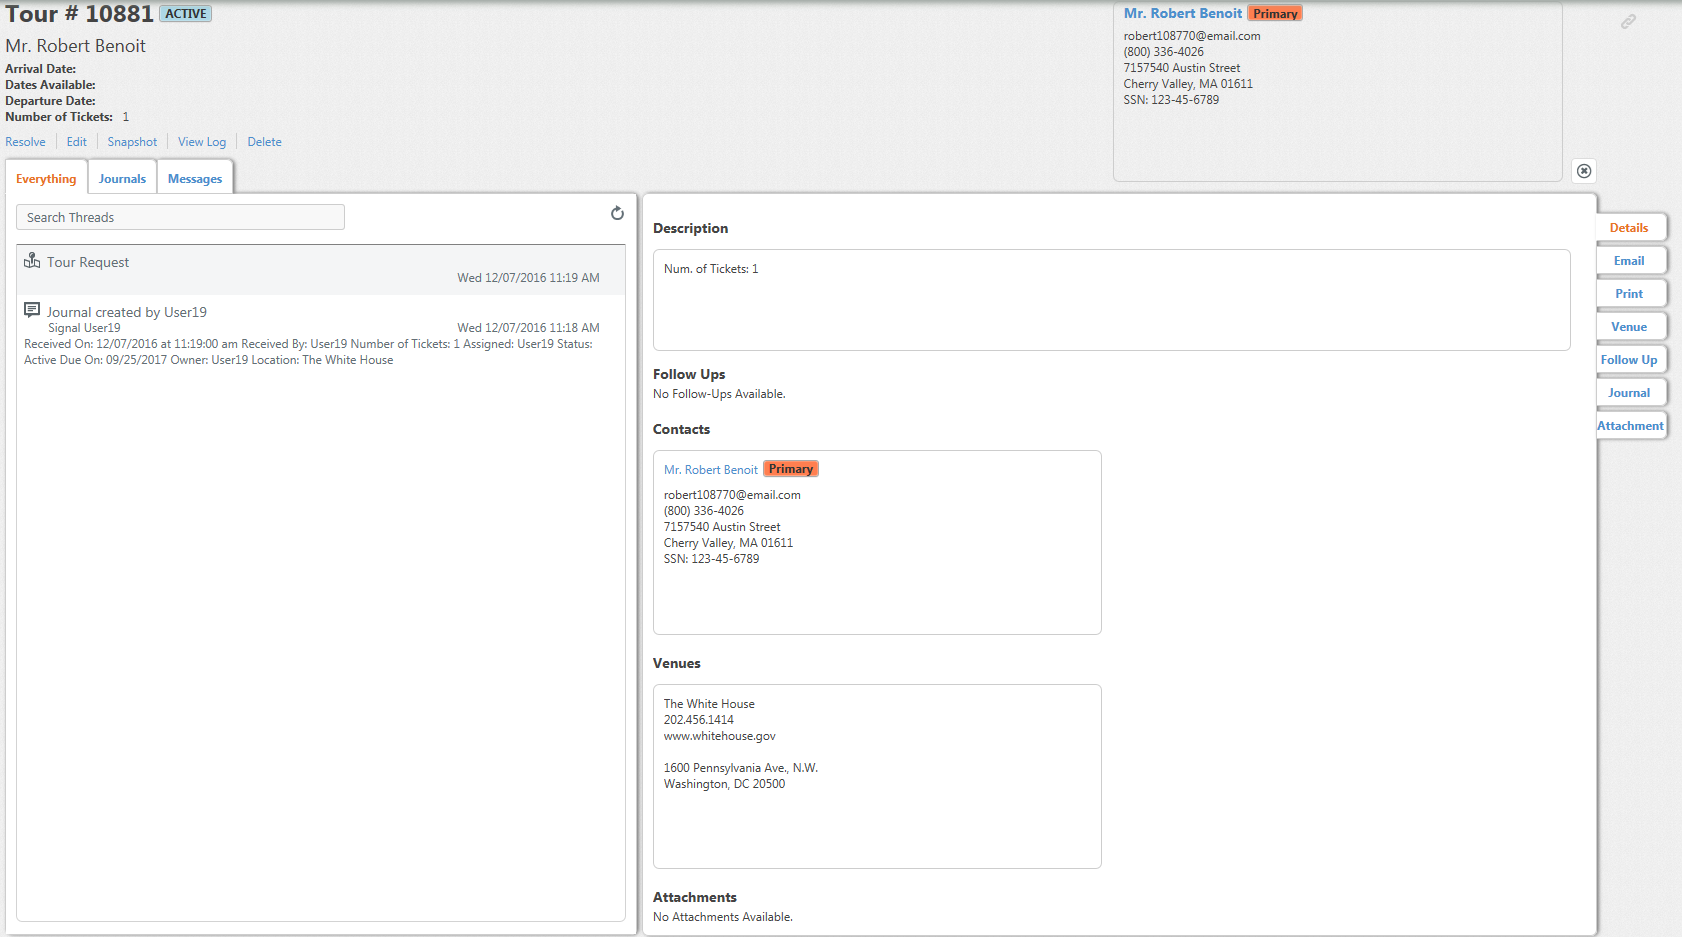
5. The left panel displays an overview of all the request interactions with the most recent item at the top. You can work with any of these items by clicking on the item.

6. When selected the item will open in the right panel.

7. Use the blue button at the top of the right panel to edit, delete, etc.
8. Use the vertical tabs located on the far right to Email, Print, Add a Flag (Flags), Add a Venue (Tours), create Follow-ups and Journals, and/or add Attachments.
Editing a Flag or Tour
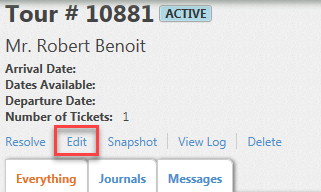
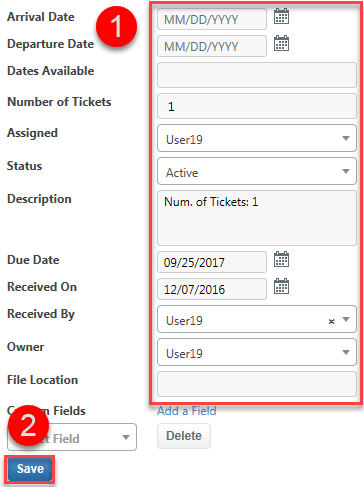
1. Click the Edit link located just below the contact's name to edit information about the request.
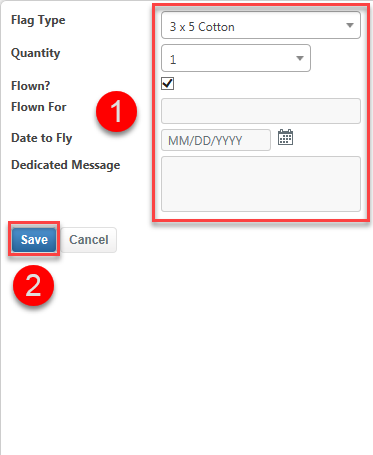
2. Edit the correct fields, click the Save button.
Resolving a Flag or Tour
1. Click the Resolve link that appears just below the contact's name.
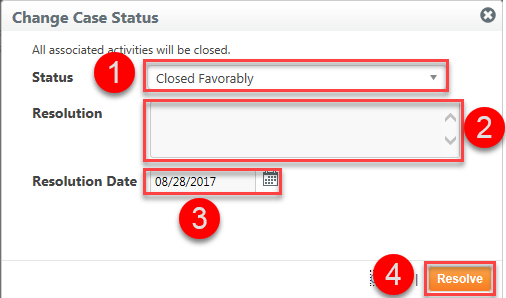
2. The Change Case Status dialog opens.
3. Select the appropriate Status and enter an optional Resolution.
4. Click the Resolve button.
You can also use the icons on the Flag or Tour viewer's toolbar to create, delete or change the status of a request. You can also perform an action on more than one request at a time using the select checkbox.

1. Select the request(s) from the list in the viewer.
Note: To highlight more than one, use CTRL. You can also select a large group by clicking on the top one, holding the Shift key, and then clicking on the bottom one.)
2. Select the appropriate toolbar button to perform the action.
Comments
0 comments
Please sign in to leave a comment.