
You can create a new flag request from within a contact’s individual record OR from the Flags toolbar in the Services module. You can also create a new flag request by converting correspondence in the Mail module to a flag.
Create a new flag request...
Creating a New Flag Request from within the Contact’s Record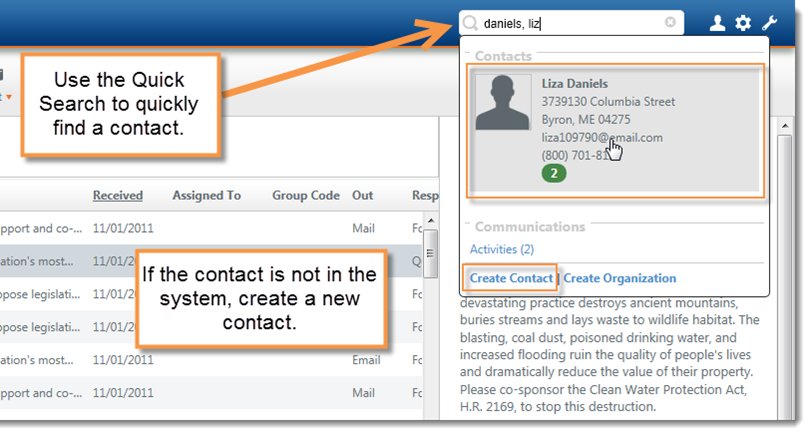
Start by searching for the contact using the Quick Search in the upper right corner. Then select the contact from the list. (If you do not see the contact listed, click Create New Contact. After filling out the new contact’s information, follow the same instructions as below.)
- Within the Contact’s record, click the blue New button that appears on the right.

- Select Flag Request from the list.
- Complete any desired information such as payment type, status, and comment.
- Click Save in the bottom right corner.
- The new flag request will appear at the top of the contact’s Overview. Keep in mind that you are still in the contact’s record and not yet in the flag request. Click on the Flag ID number to begin working on the request.

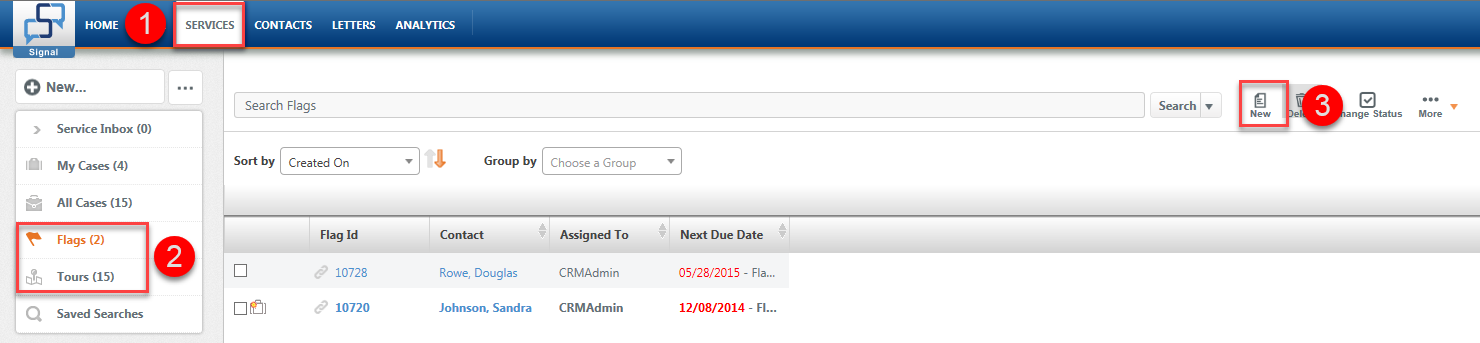
Creating a New Flag Request Using the Flags Toolbar
You can also create a new tour request using the New button on the Flags toolbar.
1. Select Services from the top navigation menu, and then select Flags from the left navigation menu.
2. Click the New button located on the toolbar.
3. The New Flag form will display in the center of your screen.
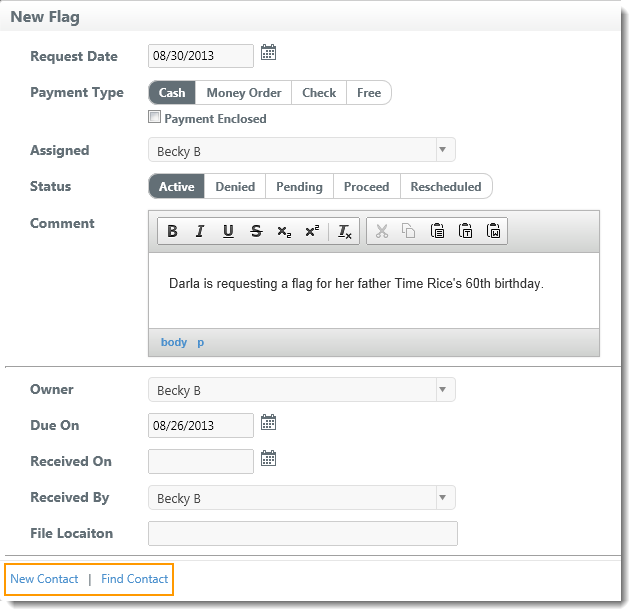
4. Complete the form with the information you have. The most important piece of information when creating a flag request is the contact who requested the tour.
- Select the date the contact is requesting the flag.
- If you have payment information, select the correct type and check if payment was received.
- Select the assigned staff member from the dropdown menu.
- Specify status. (New statuses can be created by the office.)
- You may also want to add a comment or description of the request in the comment field.
- Select a due date to keep track of when the flag needs to be sent.
- After completing the form, select Find a Contact to search for a contact. Once you find the contact, select the contact, and click Apply. If this is a new contact, click New Contact.
- After completing the new request with all of the desired information, click Save. The new request will be listed in the Flags folder.
NOTE: If you have a correspondence activity in the Mail module that should become a flag request, you are able to convert the activity to a flag, which will save the original incoming message as a flag activity and create a flag request for the contact. Click here to learn how to Convert a Mail activity to a Flag or Tour.
Comments
0 comments
Please sign in to leave a comment.