
If you are receiving a workflow from another staff member, you might occasionally need to add, delete, and/or change the assigned to of one or more steps/tasks.
To edit the workflow definition:
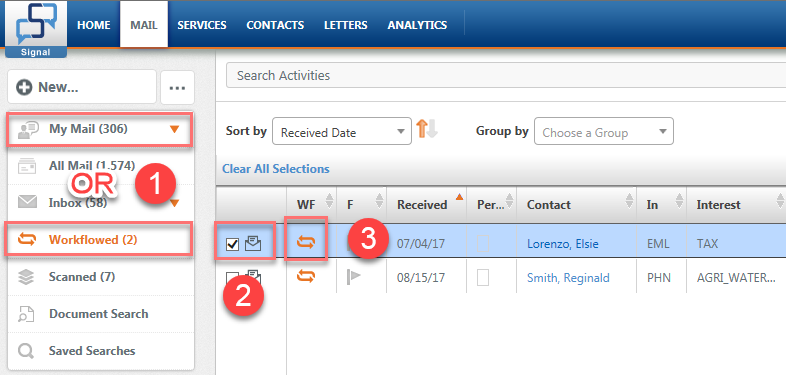
- From the top level navigation, click Mail, Services or Letters.
- Select either My Mail, My Cases, My Letters, or Workflowed from the left navigation.
- Place a check in the checkbox of the appropriate workflowed activity, case, or letter.
- Click the orange Workflow icon.
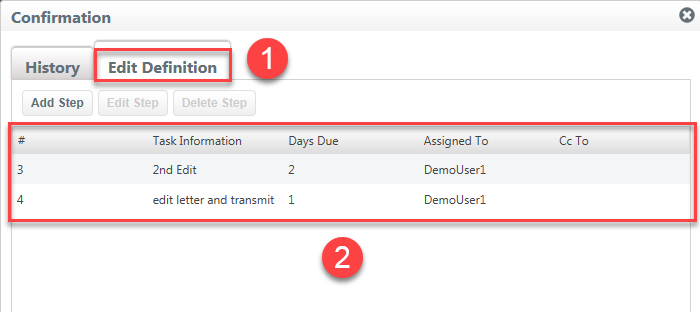
5. A workflow Confirmation dialog opens.
6. Click the Edit Definition tab to view all current workflow Steps/Tasks.
NOTE: Steps/tasks that have already been approved will not display.
To add a step:
1. From the Edit Definition tab, click to select the step where you want insert the new step. Remember it appears below your selection.
2. Click the Add Step button.
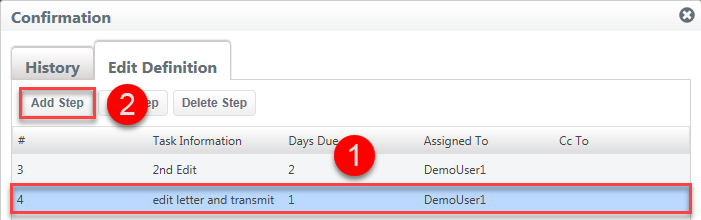
3. The Add New Step dialog opens, enter Task Description, Due in Days, Assigned To, and CC To (optional).
4. Click the Add button, the new step inserts below selection.
5. Click the Approve button to continue the workflow until completed.
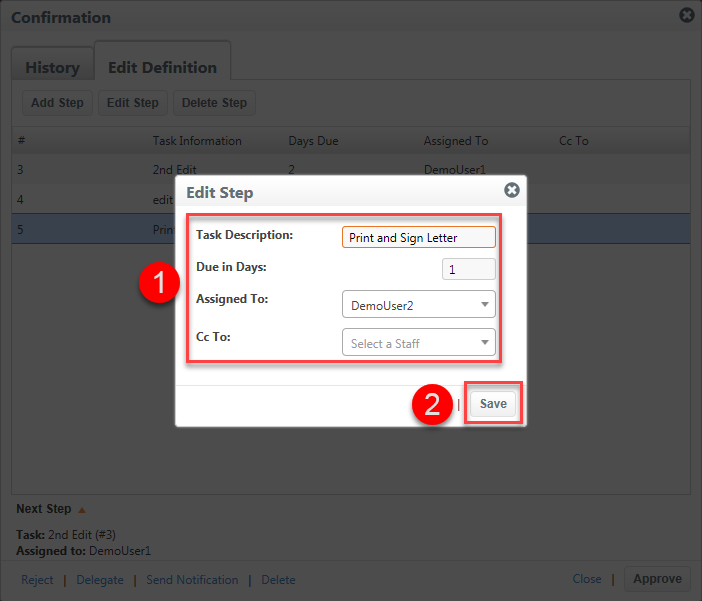
To edit a step:
1. From the Edit Definition tab, click to select the step to edit.
2. Click the Edit Step button.
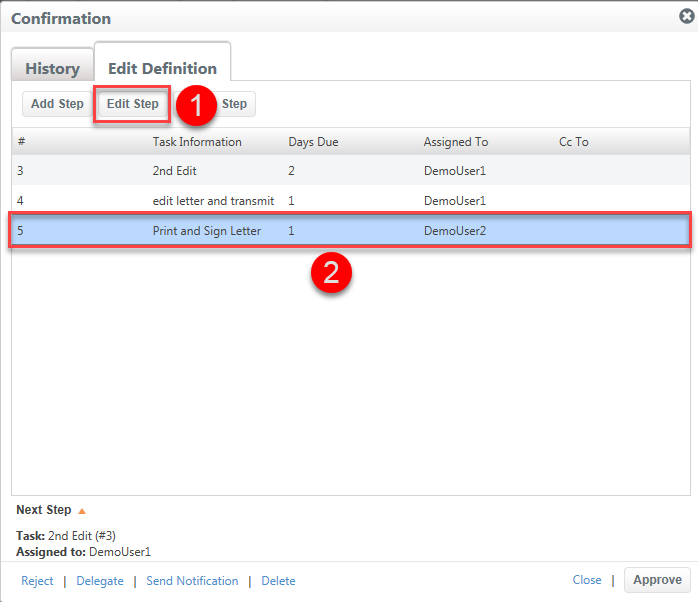
3. The Edit Step dialog opens, make necessary edits to the step (Task Description, Due in Days, Assigned To, and/or CC To).
4. Click the Save button.
5. Click the Approve button to continue the workflow until completed.
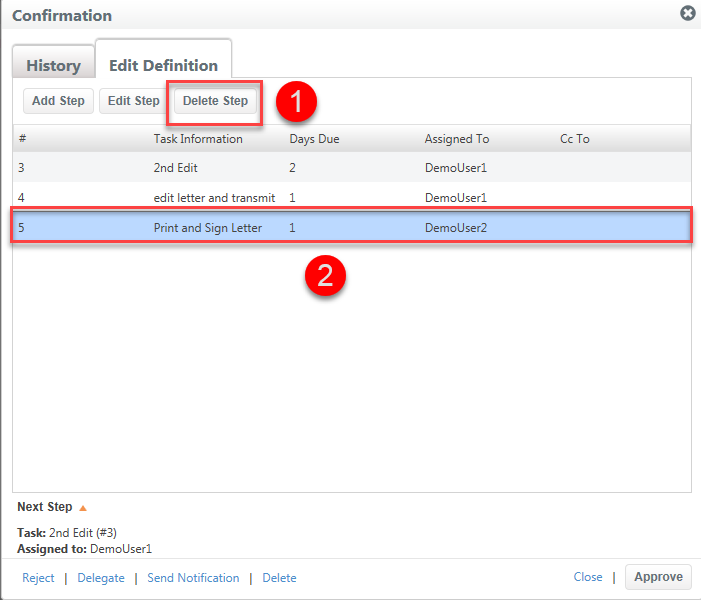
To delete a step:
1. From the Edit Definition tab, click to select the step to delete.
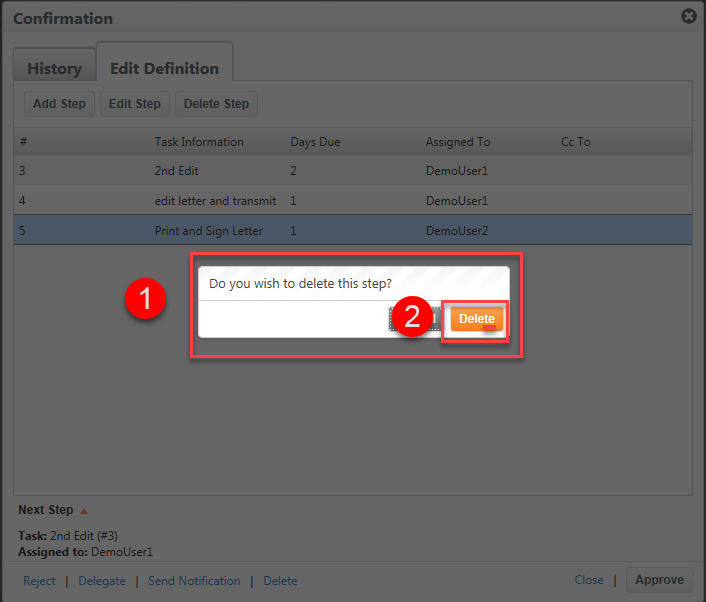
2. Click the Delete Step button.
3. The Do you wish to delete this step? dialog opens, click the Delete button.
5. Click the Approve button to continue the workflow until completed.
Comments
0 comments
Please sign in to leave a comment.