Inserting the Table
In order to upload a photo, you will need to be in the "Edit Content" window within the eNewsletter Gateway. From there, you want to click the Insert Table button, shown below.
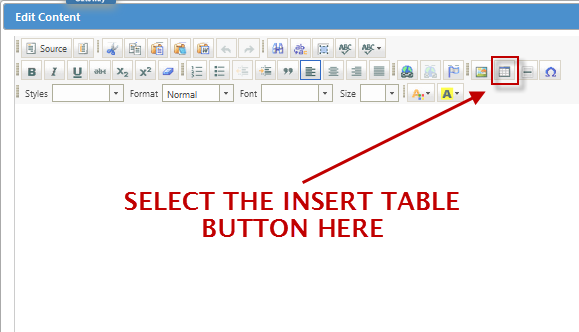
After clicking the Insert Table button, the Table Properties window will appear. From there, insert the below values accordingly:
- Set the "Rows" field to '2'
- Set the "Columns" field to '1'
- Set the "Width" to the desired pixel width or percent. (A pixel is an exact measurement about the size of a period, but percent allows a bit of flexibility. If you have a responsive newsletter, use percent.)
- Set the "Border Size" field to '0'
- Set the "Cell Spacing" field to '5'
- Set the "Cell Padding" field to '1'
- Depending on whether you would like text to wrap to the right, to the left, or have the image stand centered by itself, set the "Alignment" field to 'left,' 'right,' or 'center,' respectively.
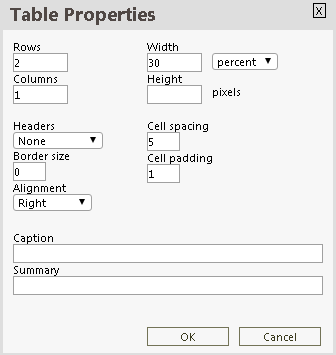
After all of the values have been properly set, you can now click "OK" to insert the table. It should appear within the content editor.
Inserting the Image
Next, you'll want to insert the image. Before adding your image, make sure that the file size is no larger than 1 MB, and that the file name of the image has no spaces or special characters.
Start by clicking into the top cell of the table, shown in the image below.
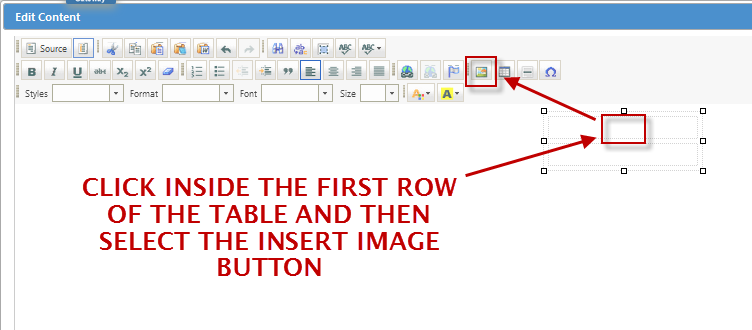
After clicking the Insert Image button, the Image Properties window will appear. From there, follow the below steps:
- Select the Upload tab and hit the Browse... button
- Locate and choose the photo you wish to upload and click OK. This should bring you back to the Image Properties window with the file name you selected listed next to the Browse... button.
- From there, hit the Send it to the Server button
- Wait until you are brought to the Image Info tab and the image has fully loaded in the Preview window.
- In the Image Info tab, you can alter the image's height, width, alignment, etc. In order to navigate back to this window after inserting the image, you can right-click on the photo and select Image Properties.
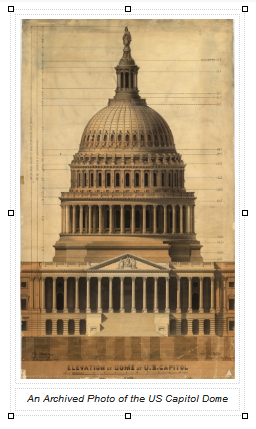
- Hit the OK button if everything looks correct or after making any edits, and the image should insert itself into the table.
Adding the Caption
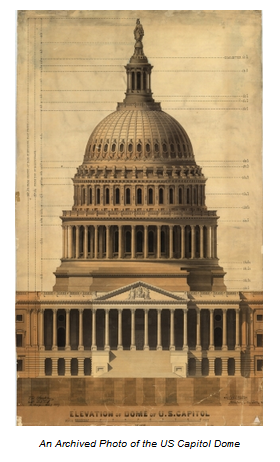
Click your mouse inside the second row of the table and type out the caption. You can add a stylistic touch to your eNewsletter by having a different font type or style for captions such as smaller italicized text or bold uppercase text.
Make sure to preview your great work and send a test mailing to yourself before sending out the final result!
 |
 |
Comments
0 comments
Please sign in to leave a comment.