User Defined Fields (UDF) are fields that you can customize within Signal. UDFs are available for Contacts, Casework, Flags, and Tours. If there is something your office needs to record that you don't already see within the available options of one of these records, you can create a UDF for that item.
Configuring your UDF Fields:
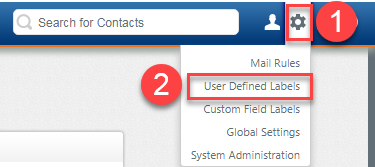
- Click on the Gear (Change Settings) icon, select User Defined Labels from the drop-down.
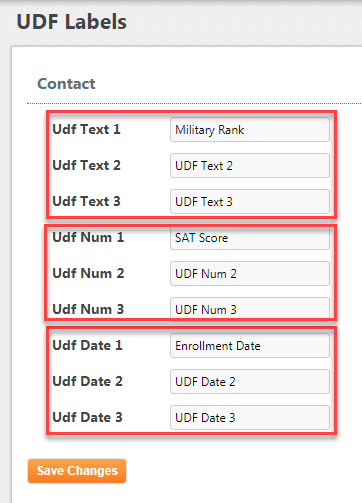
- Choose the correct UDF type. Each type
- Text - free type field allowing any alphanumeric character entries
- Number - only allows numerical characters entries
- Date - only allow date entries
- Type in your field's name. This will display when you edit and enter contact records.
- Scroll to the bottom of the screen and click the orange Save Changes button.
Updating UDF fields within a contact's records:
- If this is a new record that you're creating, below the fields you are filling out, you'll see an orange dropdown arrow next to "User Defined Fields." Click it to expand your selection options.
- If this an existing record, open the record, and click the "Edit" link that appears in the upper left. Below the existing fields, you'll see a drop down for "User Defined Fields." Click the arrow.
- You will see the friendly name for your field(s).
- Enter the correct information.
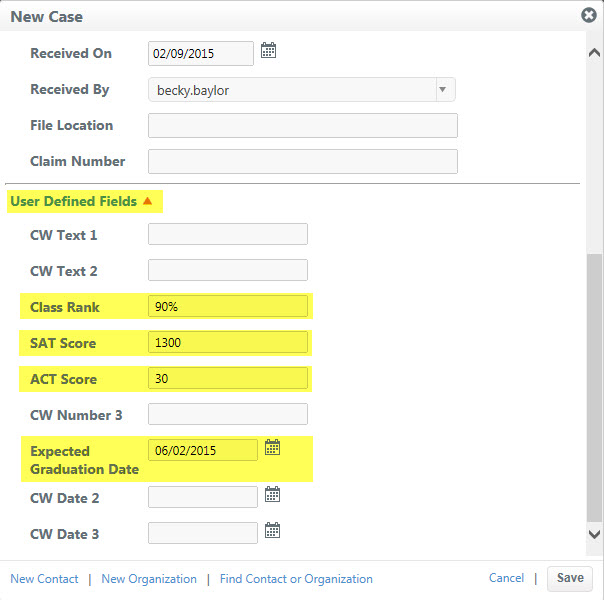
- Click Save.
Adding the UDF column(s) to your Casework, Flag, or Tour Viewer:
- Click the Gear icon located to the right of "Display per page".

- The Viewer Settings dialog opens.
- Scroll down to the UDF fields section and place a check in the fields you wish to display.
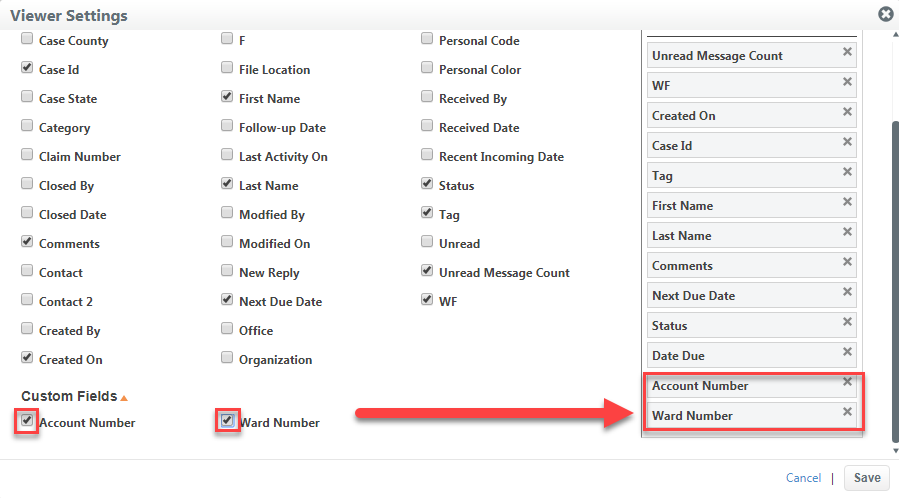
- Selected fields will display in the "Reorder Fields" section on the right, drag field to the correct position.
- Click the Save button.
- Selected UDF fields now display as columns in the viewer.

Creating filtered folders and saved searches using UDFs:
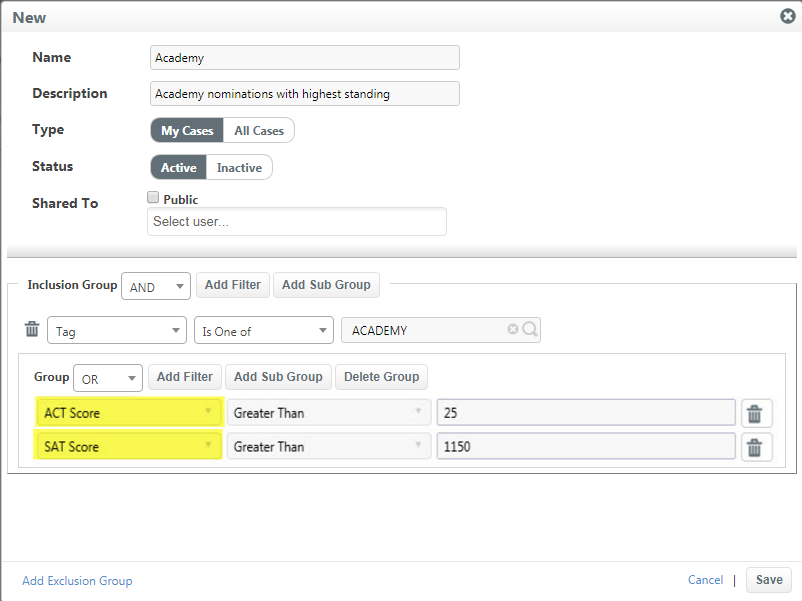
- Click the New button that appears in the upper right, and select either New Filtered Folder or New Saved Search.
- Give it a name, and if this is a filtered folder, select the location.
- In the Inclusion Group section, click the Add Filter button to begin adding and organizing your filters.
- Your new UDFs will appear as options. Select the desired UDF.
- Choose an operator such as "greater than" or "like" depending upon the type of field (text, number, or date).
- Type in the keyword.
- Click the Save button.
- To view your results, click the new folder or search that now appears on the left navigation panel.
Exporting Services records with UDF(s):
- From the Services viewer click the Export icon to the right of "Display # per page".

- Check the checkboxes in front of each field you'd like to export, including UDF.
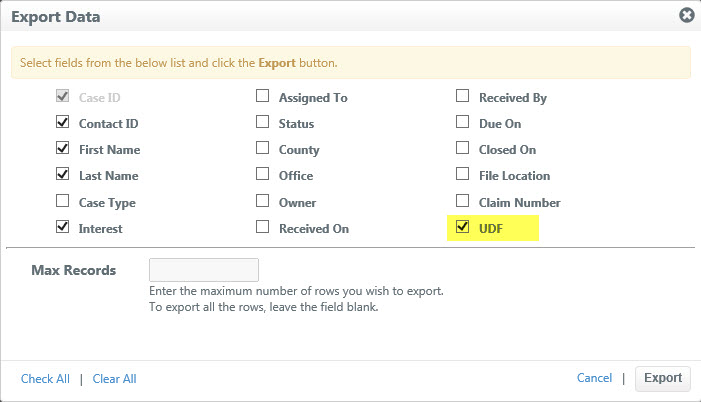
- Click Export.
- Your download will be in .csv format which can be opened with Excel.
Exporting the UDF for Contact records:
- If in the Contacts module, don't select any records if you plan to export all. (If you only want to export specific records, then select those you wish to export.)
- Click the More button on the right.
- If only exporting a few, choose Export Selected. If exporting all, select Export All.
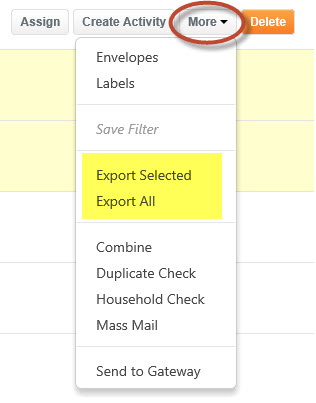
- The remaining steps are the same as exporting a list in the Services module. Check the checkboxes in front of each field you'd like to export, including UDF.
- Click Export.
- Your download will be in .csv format which can be opened with Excel.
Comments
0 comments
Please sign in to leave a comment.