No matter where you're working in the program, you always have the Quick Search (#1) available in the upper right corner. Start by searching for the contact.
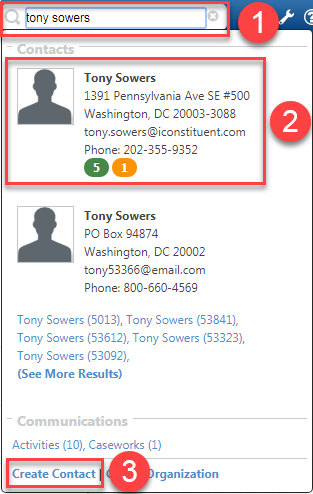
- In the Quick Search field type the contact's first and last name.
- Results will list below. If the contact is already there, you can access the record by selecting it.
- If the contact is not in the database, you will see "No results found." Click the Create Contact link at the bottom of the Quick Search results drop-down.
|
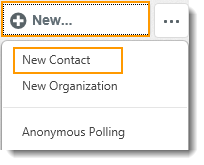
You can also add a new contact by clicking the New button above the left navigation panel and selecting New Contact. (This option appears in Mail, Services, and Contacts.) NOTE: Always use the Find Contact link at the bottom of the New Contact dialog to search for the contact before creating a new record and to avoid creating a duplicate record. |
 |
4. A New Contact dialog opens, complete the contact information form as completely as possible.
5. Type contacts Name information - Prefix, First name, Middle name, Last name, and Suffix.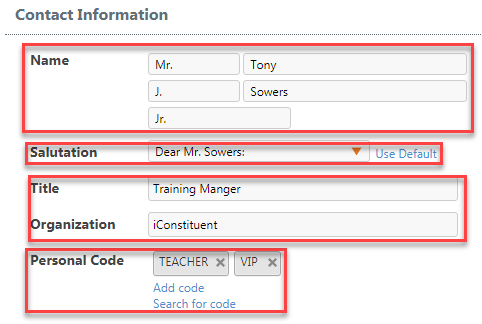
6. In the Salutation field, you can free type a salutation, select a format from the drop-down menu, or select Use Default to automatically fill in the salutation with the office's agreed upon format.
7. If the contact is writing from a business or organization, click the Add link to the right of each field and enter Title and/or Organization information.
8. To add a physical mailing address click the Add address link.
9. In the Street field enter the full street address including suite number, etc.
10. Next skip to the Zip field, enter five digit zip code. The remaining fields should auto populate based on the street address and zip code entered - City, State, County, District, State House, and Senate State District. Your zip code should now also display as zip +4.
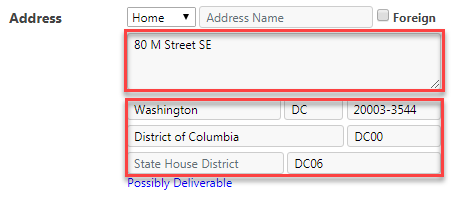
Note: To the right of the address (only if you created the contact without first searching), in the Possible Match(s) section, click the Click here link to see if there are possible duplicate records.
11. To add the new contact's email or phone click the Add email address and/or Add phone number link.
How do I log the new contact's communication (Activity)?
- At the bottom of the New Contact entry form there is a Create Activity checkbox. If you are creating the contact and also want to create a Mail/Correspondence activity, then check this box. Your Contact Information form will expand to include the fields normally associated with Mail activities.
- Populate all office required information.
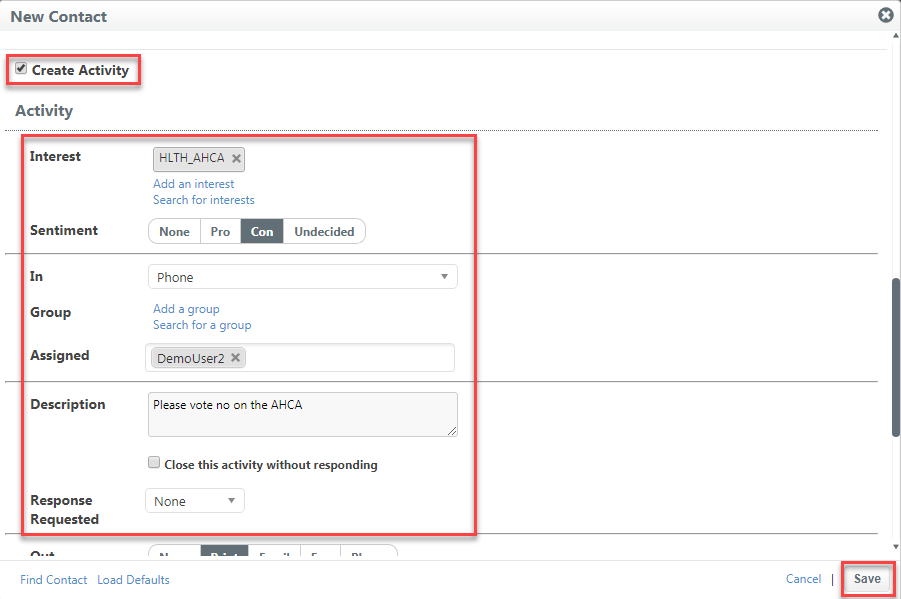
- Click the Save button.
- You will automatically be taken to the new contact's record. Make edits if necessary, or click the X in the upper right to close the new contact record.

Comments
0 comments
Please sign in to leave a comment.